On May 31 and June 1, 1916, British and German ships engaged in the greatest naval engagement of World War I. While the land conflict stalemated in the trenches and the inferno of Verdun (Battle of Verdun), the European adversaries, the British Empire and the German Empire, had not yet met on the water. The fleets ultimately met in battle at the end of May 1916, just off the coast of Denmark. Despite suffering additional casualties at Jutland, the German fleet was unable to get the upper hand, and the North Sea remained under British control until the war’s conclusion.
- German and British strategies
- The forces at work during the Battle of Jutland
- Von Scheer and the Zeppelins
- The impact of the British secret service
- The first shots and the first victim
- The arrival of the British dreadnoughts off Jutland
- We can now see the Hochseeflotte
- Scheer faces Jellicoe in Jutland
- Fighting in the middle of the night
- The outcome of the Battle of Jutland
- The tragic fate of the Hochseeflotte
German and British strategies

At the turn of the twentieth century, the German Empire established itself as a formidable rival to British dominance. Particularly in the realm of naval warfare, Grand Admiral Alfred von Tirpitz (1849–1930) had a crucial effect, passing a number of legislation between 1898 and 1908 that elevated the Hochseeflotte from sixth to second position among naval powers, close behind England. Even though war had already broken out, Kaiser Wilhelm II did not give his approval for the Hochseeflotte to attack the British navy.
At the outset of the war, the two sides adopted opposing strategies, both of which had a significant impact on the maritime domain: the British believed in the war of attrition (thanks to their control of the seas and strategic straits), while the Germans believed in the blitzkrieg (especially since they had long hoped for neutrality on the part of the British).
The Germans faced a difficult choice right away: utilize Tirpitz’s extraordinary weapon or keep it as a threat for future negotiations? Since the Allies still effectively controlled the seas, even with the advance of the German navy, the first choice was dangerous since it would take a major effort (and the attendant dangers that come with it) to oppose them. The fleet had to safeguard the coastlines, assist the ground advance, and at the same time begin to wear down the enemy navy by separating it with targeted strikes; therefore, a defensive strategy was decided, much to the chagrin of Admiral Tirpitz. Although it did not go as far as the racial conflict that began in 1939, it was nonetheless a war.
The Grand Fleet was very essential to England’s continued existence on the British side. Its primary responsibility was to ensure that Britain, its Empire, and the rest of the globe remained in constant contact with one another. The German opponent was effectively cut off from support thanks to the blockade and the resulting control of communications. But the increasing danger from submarines and the underestimation of the mine system (the Jutland region was highly suitable) scuttled this plan. The Admiralty had no choice but to keep its ships docked and keep a close eye out for any enemy sortie in case a counterattack was necessary. That’s precisely what went down in the waters off the Jutland peninsula.
The forces at work during the Battle of Jutland
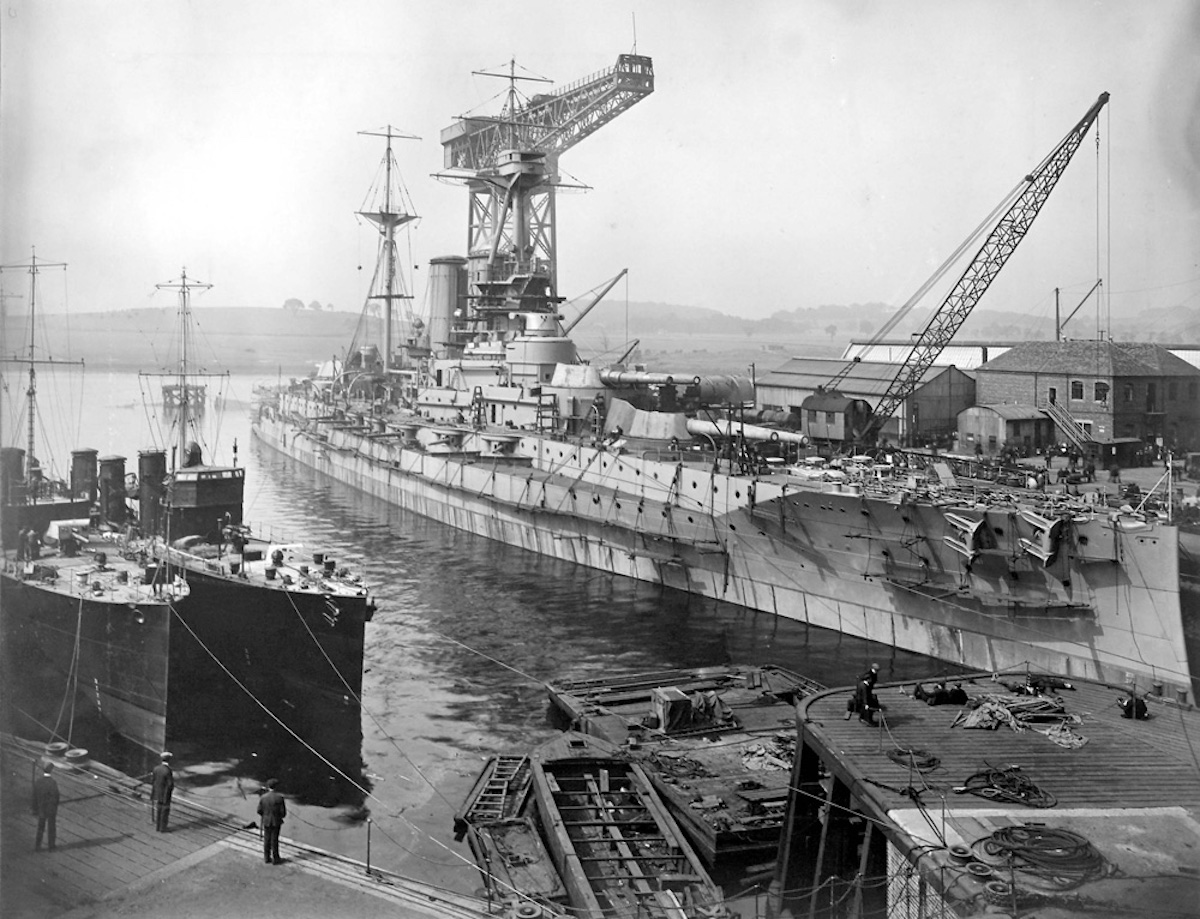
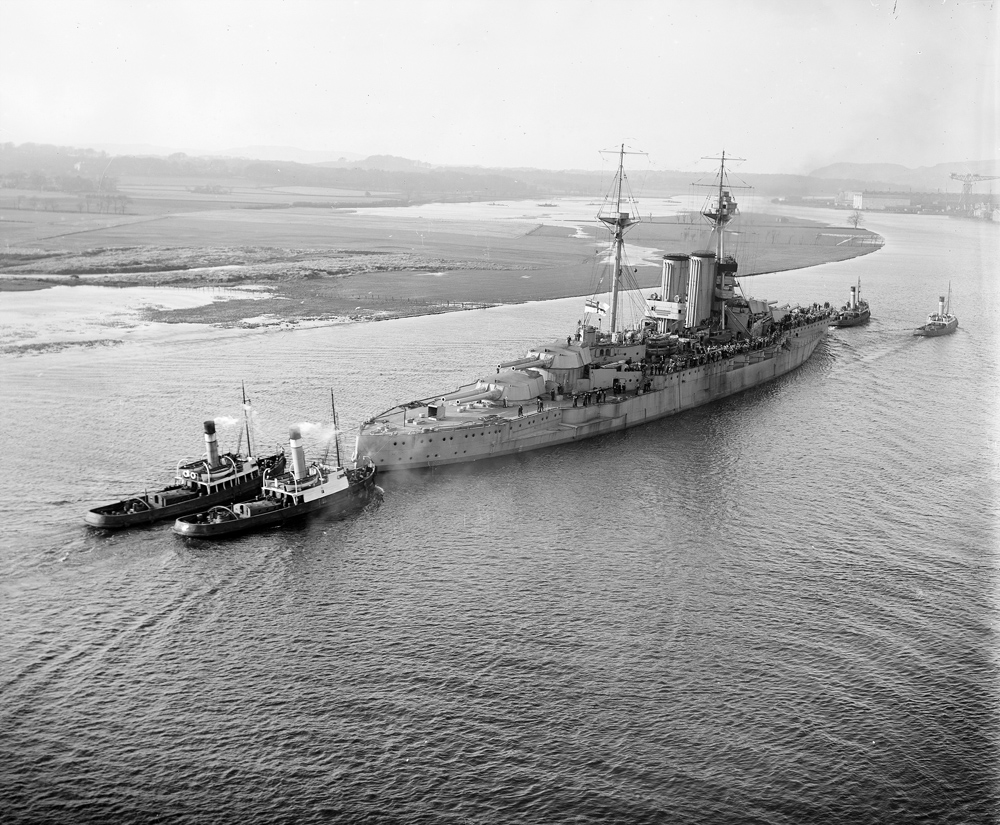
We have seen how Tirpitz’s strategy considerably bolstered the German navy, making it the primary adversary of the British fleet. In terms of raw numbers, though, the latter still had a significant advantage. With a total of 29 dreadnoughts (including the Iron Duke as its flagship), 5 battle cruisers, 8 cruisers, 14 light cruisers, and scores of destroyers, Admiral Jellicoe’s Grand Fleet was prepared to fight war (plus the torpedo flotillas). The Channel Fleet, a collection of obsolete battleships and destroyers that worked in tandem with the French navy, also played a role despite its distance from the upcoming battleground of Jutland.
Germany had 13 modern battleships and 22 older ones; four battle cruisers; fourteen modern cruisers and 5 older ones, 88 torpedo boats, and 28 submarines, the vast majority of which were stationed in the Hochseeflotte under the command of Admiral von Ingenohl (then Pohl), which had made Jutland one of its strategic areas.
Although the numbers, particularly for the larger vessels, were in the British’s favor, the quality was not. The German artillery was unquestionably better in every conceivable way, including precision, consistency, rate of fire, and shell quality. The German side had superior weaponry, including torpedoes and submarines, as well as mines.
It’s safe to say that the outcome of the impending showdown was by no means a given.
Von Scheer and the Zeppelins

In January 1916, Vice Admiral Reinhard von Scheer was named commanding officer of the Hochseeflotte, marking the beginning of a crucial juncture in the coming conflict. In contrast to his predecessor, Pohl, Scheer preferred a more aggressive approach. While John Jellicoe, his British counterpart, envisaged a great conflict between the two fleets as “the ultimate answer,” he was more cautious since the navy was important to England’s survival.
Scheer planned to take advantage of what he saw as the enemy’s reluctance, using submarines to disrupt communications, ship sorties to lure a split British fleet into his waters, and finally a bombardment of English soil as retaliation for the blockade. All of this was to be accomplished without committing the bulk of his fleet. Here’s where the Zeppelins came in; they started dropping blind bombs on Liverpool in January 1916. So as not to be caught off guard by the Grand Fleet, these airships were also utilized for surveillance.
Scheer continued to test the enemy’s defenses with offensives using torpedo boats during the coming weeks. The failure of the chases in the feared German minefields started to alarm the British. When Scheer, protected from the bombardment of Zeppelins on the South and the East of England, brought about twenty ships of the line off Zeebrugge, it marked a turning point in the growing discontent in Britain over the inability of their fleet to protect their coasts; fortunately for Britain, Scheer did not dare go to the Pas-de-Calais.
Attacks were planned to destroy the airship production facilities, but they were unsuccessful. Vice-admiral Beatty, famed for his aggressiveness, seeks to counter-attack in his turn with his battle cruisers; Scheer then sees the chance to trap him and deliver a critical blow to the English fleet; however, inclement weather dissuades him from pressing his endeavor further, despite several skirmishes.
The impact of the British secret service
German air raids were more frequent and severe in April, much to the chagrin of the general populace. Scheer planned to use the Hochseeflotte and the submarines to assault Beatty excessively in an effort to force him to evacuate. The German Vice-Admiral gave the order for his whole fleet to depart at the end of April, but thanks to the British secret service decoding the enemy transmissions, the Grand Fleet was not caught off guard and instead made sail for Heligoland. But after several rounds were fired between the cruisers, the major fight was again delayed by the fog and Scheer’s caution.
Both commanders were under immense strain, with the English populace frustrated that their navy could not defend them from attacks and the Germans’ expectations for a decisive action by the Hochseeflotte increased by the abandonment of the submarine fight (under the threat of the Americans). Scheer wished for, but clearly had the initiative in, a confrontation with Jellicoe, and Jellicoe must commit to it despite his (too?) cautious personality.
On May 30th, the British Admiralty received word from their intelligence agencies that the enemy fleet was massing, and they were given the order to lift the anchor. Scheer, on the other hand, had no idea that the British were tracking his every step or that he was about to walk right into the trap he had laid. Scheer used Rear Admiral Hipper’s squadron as a “carrot,” forcing them to stay in the northern part of Jutland so that they could continue to harass Beatty’s British spearhead, which was cut off from the Grand Fleet.
First, Scheer’s trap against Beatty was successful, as Beatty did not wait for the Grand Fleet to rush towards Hipper, who was heading towards Jutland; indeed, the Admiralty did not know that Scheer, if he had sailed, was also not far away, to the South of Hipper’s position. This seemed to turn the tide in favor of Scheer. Then, because of some mixed-up radio signals, Jellicoe fails to get his seaplane transportation, which was going to be responsible for keeping his fleet well-lit. Scheer, fortunately for the English, was deprived not only of aerial surveillance but also of submarines, rendering him incapable of damaging the German fleet and, more importantly, of warning of its evacuation from the roadsteads.
The first shots and the first victim

Beatty showed up at the agreed-upon location near Jutland and prepared to “welcome” Hipper’s squadron. With 6 battlecruisers and 4 dreadnoughts at his disposal, he felt formidable despite Hipper’s planned fielding of just 5 battlecruisers. A Danish freighter traveling by was observed by both squadrons at the same time, and each sent an advance guard to establish their position; of course, they also saw each other, which was what made these engagements so famous. A shell was fired, and the British cruiser Galatea was the target. Thus started the Battle of Jutland.
Beatty, not well located at the outset, had to separate his battlecruisers from his dreadnoughts in order to return fire under more favorable circumstances, which caught the British squadron by surprise. Amid further confusion on both sides, the fleets converged for the showdown; however, Hipper successfully steered Beatty south, directing both fleets directly onto the Hochseeflotte. In the meantime, the Grand Fleet had increased its speed to reach its Vice Admiral as soon as possible.
Beatty’s Lion and Hipper’s Lützow led their respective squadrons forward in parallel lines, with 18,000 meters separating them. A German cruiser fired first, followed by British lead ships. Beatty had more men on his side, but the German commands and bullets were more accurate; the British flagship and the Princess Royal were struck twice, while the Tiger was damaged four times. The Tiger and the Lion took the biggest hits.
Thankfully, the Queen Mary was able to strike the Seydlitz, weakening its fire, and then the Lützow, which in turn was damaged. At 4 o’clock in the afternoon, with the combat having only begun a quarter of an hour before, the Lion took another hard blow that almost disabled it. The cruiser Indefatigable was the first casualty of the Battle of Jutland; after being damaged by the Von Der Tann, it sank with over a thousand men on board (only two of whom were saved).
The arrival of the British dreadnoughts off Jutland
Confusion reigned as the scuffle persisted, particularly when the German cruiser Moltke decided to fire torpedoes. Then, in an effort to get the upper hand, Rear Admiral Hipper drew closer to the enemy fleet. Unfortunately, he was now threatened by the battleship squadron (the dreadnoughts) that Beatty had been forced to abandon and that had finally joined him. The Barham started fire on the Von Der Tann, followed by the Valiant, the Warspite, and the Malaya, which also aimed for the Moltke; this squadron consisted of the most modern heavy ships in the English navy and was therefore a crucial reinforcement for Beatty, who had been surprised by Hipper’s onslaught. Since Hipper was unable to execute the killing blow, Beatty was given a breather, and the tension of the battle decreased.
As Hipper closed the distance again, the fighting continued, this time with greater intensity. The German ships Von Der Tann and Seydlitz were severely damaged, while the British Lion took heavy damage as well. Yet the latter, aided by the Derfflinger, zeroed in on the Queen Mary, which went up in flames at 16:26. If most German vessels were damaged, the British loss of two cruise ships was nonetheless much regretted. Beatty, though, steadfastly refused to back down.
We can now see the Hochseeflotte
The torpedo boats, or light ships, had to join the dance next. Quick and nimble ships started a frenzied dance of blows. The British took advantage of the situation by attacking the German cruisers, forcing them to swerve to avoid being struck by their opponents’ fire. It was about time, because Scheer’s Hochseeflotte was already in sight!
It’s only 5 o’clock, and already the English have lost two cruisers and two destroyers. The Germans have also lost two of these light ships, but none of them are heavy; however, the blows have reduced the firepower of several of their cruisers, and the Hipper squadron would have been in grave danger if Scheer hadn’t arrived. The battle in Jutland was far from over.
Even after the Hochseeflotte showed up, Beatty still sought to steer Scheer and Hipper north of the Jutland area, directly onto the Grand Fleet, which did not inspire confidence in him. Actually, the Germans had no idea that Jellicoe’s navy had left port. The English fleet was somewhat disordered and separated as a result of the repeated communication mistakes; the battleship (Barham’s) had to confront the Hochseeflotte, while Beatty attempted to join the Grand Fleet. The Warspite took a serious beating from the König, although the latter’s primary target was really Malaya. However, much to the dismay of the Germans, the damage was not significant and the casualty count was not particularly high. And with that, Beatty was finally able to take a deep sigh of relief. Evening had arrived at 5:15.
Less than a quarter of an hour later, the Lion (badly damaged), Princess Royal, Tiger, and New Zealand started firing at the Lützow, Seydlitz, and Derfflinger. Hipper had to abandon ship after the German flagship took heavy damage. Simultaneously, Rear Admiral Hood’s squadron arrived and compelled the German commander to make a run for the Hochseeflotte. Chester and Canterbury, two cruisers, aided Beatty, although Chester was a touch too daring and was only rescued from German fire with the assistance of the Invincible. However, the deployment of the Grand Fleet was chaotic, and the Germans were caught off guard.
Then an ancient British cruiser named the Defense showed up and decided to fight, despite the fact that it was not as powerful as the German vessels. Joined by the Warrior, it just served to add to the chaos by hoping to destroy the Wiesbaden. When it came under fire from the Lützow, it blew up and vanished, taking its crew with it. Though his friend met the same fate, the dreadnought Warspite stepped in to rescue both of their lives when it was struck in the rudder and became a priority target for the Germans, allowing the Warrior to escape.
Scheer faces Jellicoe in Jutland
The Iron Duke opened fire at 18:23, with some success, but other ships’ poor visibility prevented Jellicoe from taking full advantage of his tactical advantage. Nonetheless, he decided to maneuver to keep the enemy fleet on his west, and Scheer quickly realized that he could not resist for long in the face of this unexpected arrival of Jellicoe.
At this point, Hood’s whole squadron had joined the fray, attacking Hipper’s vessels, and Hipper had reacted with the Lützow and the König, killing Hood’s flagship, the Invincible. Another German had been killed, bringing the total to four.
Scheer made complicated but carefully planned maneuvers to attract the enemy, capitalizing on the success of Hipper’s cruisers (who had to abandon the Lützow, which was too badly damaged), and ensuring that the Hochseeflotte wouldn’t be outnumbered if it had to withdraw without incident far from Jutland. However, just before 7 o’clock, the Vice-Admiral attempted a maneuver with which he was familiar: he tacked to the center of the arc created by the Grand Fleet! According to Scheer’s memoirs, he decided on this strategy so that he could maintain the initiative until dusk, when the enemy might potentially place him in a tough position; the only way to do this, he believed, was to surprise the opposition.
The British fleet’s vanguard, which included the cruisers Hercules and Colossus, fired against the approaching German cruisers; the Derfflinger and the Seydlitz sustained intense fire and serious hits from a total of 13 enemy ships. The Von Der Tann had to withstand the fire of the Valiant and the Malaya. In a short time, the Iron Duke had joined them.
Scheer’s move backfired, and his fleet became the target of relentless fire that threatened its annihilation. He turned around again and ultimately sacrificed his battlecruisers in an effort to save the rest of his fleet. The battlecruisers have been given the order to engage the enemy at full speed and run them over. Rush in and ram! In doing so, he hoped to save the remainder of his fleet from certain destruction.
The torpedo boats once again stood out, this time by charging the British fleet as an auxiliary to the battle cruisers and covering Scheer’s escape. The British battle fleet was endangered by their torpedoes, and they retreated under heavy fire from the rest of the fleet. Jellicoe was forced to alter his course and withdraw from the enemy, missing a key opportunity to destroy Scheer.
Fighting in the middle of the night
Even as darkness fell over Jutland, German expectations remained high. Scheer was at his best against a cautious Jellicoe. As chaotic and sporadic as they were throughout the day, the clashes restarted. Scheer sped away from the trap, and Jellicoe followed, looking for a safe way to attack his opponent.
Around 10 o’clock, the light cruisers assumed control of the battle, with the Southampton eventually sinking the Frauenlob. After then, the British destroyers lighted up the night with their fire and launched further assaults. However, the cruiser Black Prince did not fare as well, as it became separated from the Grand Fleet and then collided with the first German battleship. The Thüringen, the Nassau, and the Friedrich der Grosse all opened fire on it just after midnight, and it detonated. However, the British destroyers kept up their assaults, and at 2:10 a.m., they were rewarded when a torpedo sank the battleship Pommern. Meanwhile, the Lützow was left in the middle of the ocean and sank.
The outcome of the Battle of Jutland
Jellicoe saw no point in pressing the issue now that the Hochseeflotte had returned to the sea and the Battle of Jutland had concluded. British losses in the seas of Jutland were the battlecruisers Queen Mary, Indefatigable, and Invincible, the cruisers Defence, Warrior, and Black Prince, and eight destroyers, with a total of almost 6,000 dead (for 60,000 engaged). Losses of the battlecruiser Lützow, the battleship Pommern, the light cruisers Wiesbaden, Elbing, Rostock, and Frauenlob, and five destroyers, together with almost 2,000 dead (out of 45,000 engaged), were deeply mourned by the Germans.
Over the course of the Battle of Jutland, more than 20,000 rounds were fired and almost 250 ships were involved. The fight was definitely won by the Hochseeflotte, which had better firepower. England’s greater intellect was on display, but that was about all. The strategic victory, however, was unquestionably won by the British; the Grand Fleet maintained its capacity to protect the coastlines and lines of communication while putting an embargo on the Germans, who did not dare to withdraw their fleet from the war.
In this conflict, each side declared victory for itself. Despite suffering twice as many casualties at the hands of the German navy, the British were able to keep it at bay.
The tragic fate of the Hochseeflotte
In 1919, the formidable German fleet met an even more terrible end: scorched by Jutland, the British compelled their adversary to hand the Hochseeflotte to them in their own harbor in Scotland, at Scapa Flow, the ultimate humiliation. Vice Admiral Ludwig von Reuter ordered the ships to sink on June 21, 1919, because he refused to let the victors divide his fleet. The British were caught off guard, and more than 50 ships managed to get away. Friedrich der Grosse, the König, the Seydlitz, the Derfflinger, and the Von der Tann were just a few of the Jutland heroes who were present.
Bibliography:
- Keegan, John (1999). The First World War |United States. Alfred A. Knopf, Inc. ISBN 0-375-40052-4.
- Kennedy, Paul M. (1983). The Rise and Fall of British Naval Mastery. London: Macmillan. ISBN 0-333-35094-4.
- Kühlwetter, von, Friedrich (1916). Skagerrak : Der Ruhmestag der deutschen Flotte. Berlin: Ullstein.
- O’Connell, Robert J. (1993). Sacred Vessels: The Cult of the Battleship and the Rise of the U.S. Navy. Oxford: Oxford University Press. ISBN 0-19-508006-8.
- Rasor, Eugene L. (2000). Winston S. Churchill, 1874-1965: A Comprehensive Historiography and Annotated Bibliography. London: Greenwood. ISBN 0-3133-0546-3.


